INTRODUCTION TO ANIMATION (DANM 131)
1) Open Final Cut, and create a new Project (File <New Project)
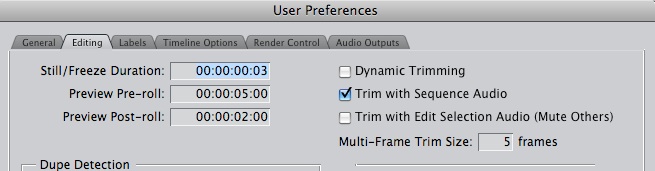
2) Go to, Final Cut Pro < User Preferences < and click on the editing tab.
-
3)Change the Still/Freeze Duration to 00:00:00:03 and press “OK”
4) In your bin highlight Sequence 1
5) Go to, Sequence < Sequence Settings < and use these settings:
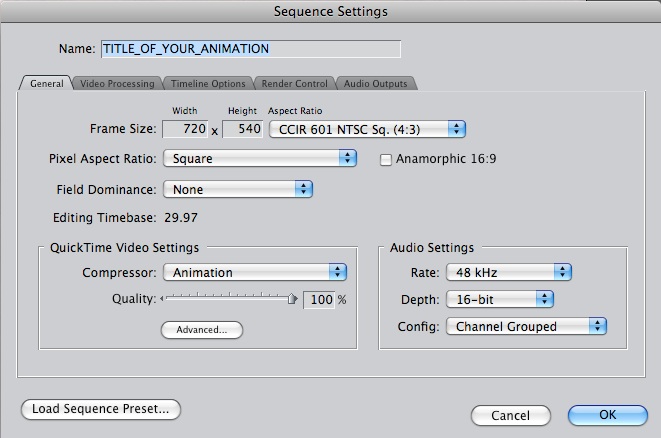
Note: these settings are for importing frames only. We will not be using these setting once we have created actual footage.
6) Grab your folder of frames, and drop it into your Bin.
-
7)Drag the folder from your bin to the beginning of the timeline.
-
8)To view your animation you will need to render it (Sequence < Render All < Both)
9) Go to File <Export< Quicktime Movie
10) Change “Current Settings” to “DV NTSC 48 kHz” and and press “Save.”
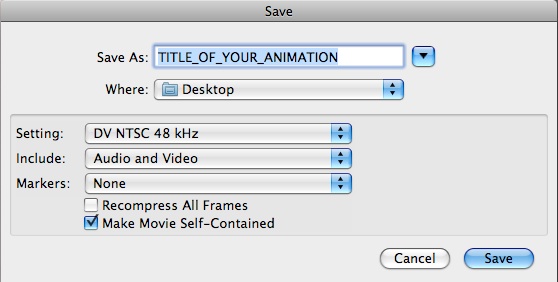
You now have an animated movie in standard NTSC DV format. We have converted it into this format so it will be easy to work with while editing timing, speed, sound etc. The default final cut settings match the settings of your movie, so you no longer need to worry about changing them.
To edit this movie:
1) Create a new final cut project
2) Save it in a folder with the movie you just made (this is important for it to link).
3) Import < Files< find your new .mov file and press “OK”
4) Drag the file from your bin to the timeline and start editing.
5) When your ready to export simply Export < Quicktime Movie < “Save.”
How to bring captured frames into Final Cut Pro